Articles on the help category on this website may be outdated. Please visit Our new help center to read the latest content.
Moving from Xero to Wafeq

You can manually migrate your data from Xero to Wafeq or use the Wafeq Migration Assistant.
With the Wafeq Migration Assistant
The Migration Assistant will automatically migrate the following data from your Xero account:
Get 30% Off Wafeq yearly packages
Enter your email to receive your exclusive discount code. New users only!
- Chart of Accounts
- Contacts
- Items (non-inventory)
- Invoices, invoice payments
- Credit notes, credit note payments, overpayments
- Bills, bill payments
- Manual journals
To start the automated migration
- In the main side menu, click on Migration Assistant
- Choose Xero
- Proceed to connect your Xero account with Wafeq
- Once connected, you will be returned back to Wafeq to configure your migration
Configuring the Xero migration
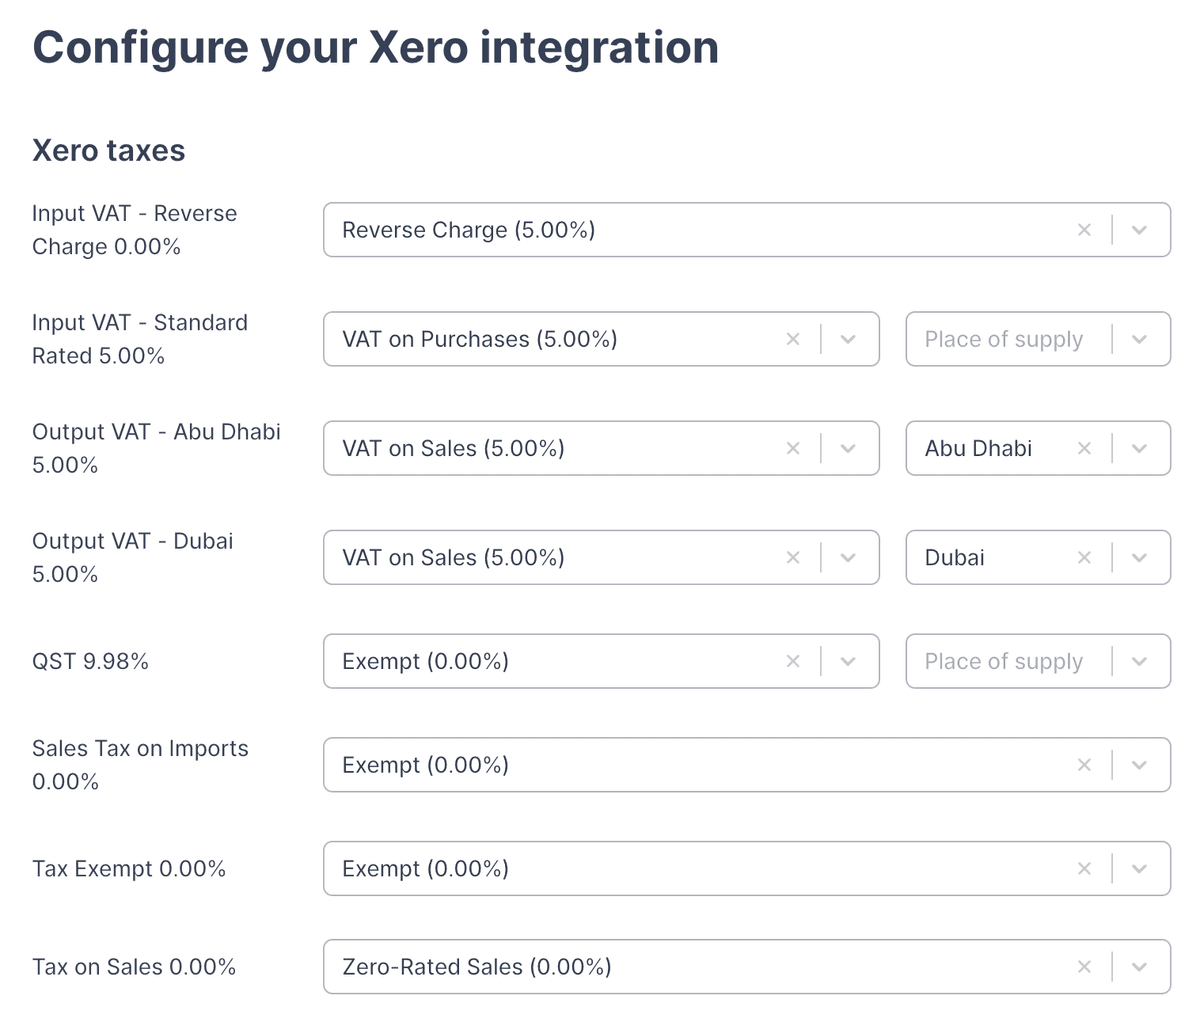
You will need to map your Xero tax rates with Wafeq tax rates.
Important notes:
- Since Xero Global Edition does not support reverse charge, you may have created a 0% tax rate for your Reverse Charge purchases. Make sure to map it to the Wafeq Reverse Charge tax rate.
For United Arab Emirates organizations
For United Arab Emirates organizations
If you've configured one VAT output tax rate per Emirate in your Xero account, you must map your VAT output Xero tax rate with the Wafeq tax rate and Place of Supply.
For VAT Input tax rates, the place of supply should be left blank.
Make sure to map your Xero tax rates to Wafeq default tax rates
Make sure to map your Xero tax rates to Wafeq default tax rates
In order to benefit from Wafeq's automatic VAT Return generation, make sure you are mapping your Xero tax rates to one of the Wafeq system tax rates.
Manually
Export your data from Xero
Follow Xero's article on how to export your accounting data.
You will want to export the following:
- Chart of Accounts
- Fixed assets
- Invoices and bills
- Trial balance
- Contacts
Import your data into Wafeq
To import your data into Wafeq, read this article which explains the steps to import each type of transaction.


![New Product Features [March-2023]](/_next/image?url=https%3A%2F%2Ffirebasestorage.googleapis.com%2Fv0%2Fb%2Fwafeq-docs.appspot.com%2Fo%2Fmedias%252Fd68397dc_Help%20Center%20-%20EN%20Article%20Cover-22.png%3Falt%3Dmedia&w=3840&q=75)


.png%3Falt%3Dmedia&w=3840&q=75)


