Articles on the help category on this website may be outdated. Please visit Our new help center to read the latest content.
Setting up payroll

Learn how to easily manage employee salaries with Wafeq Payroll.
How does Payroll work in Wafeq?
The Payroll feature allows you to:
Get 30% Off Wafeq yearly packages
Enter your email to receive your exclusive discount code. New users only!
- List all your employees and their salaries.
- Create payslips and send them to your employees.
- Break down the types of payroll expenses (e.g. Housing, Basic Salary, Transporation, GOSI, etc.)
- Reimburse employee expense claims during the payroll cycle.
Step-by-step instructions
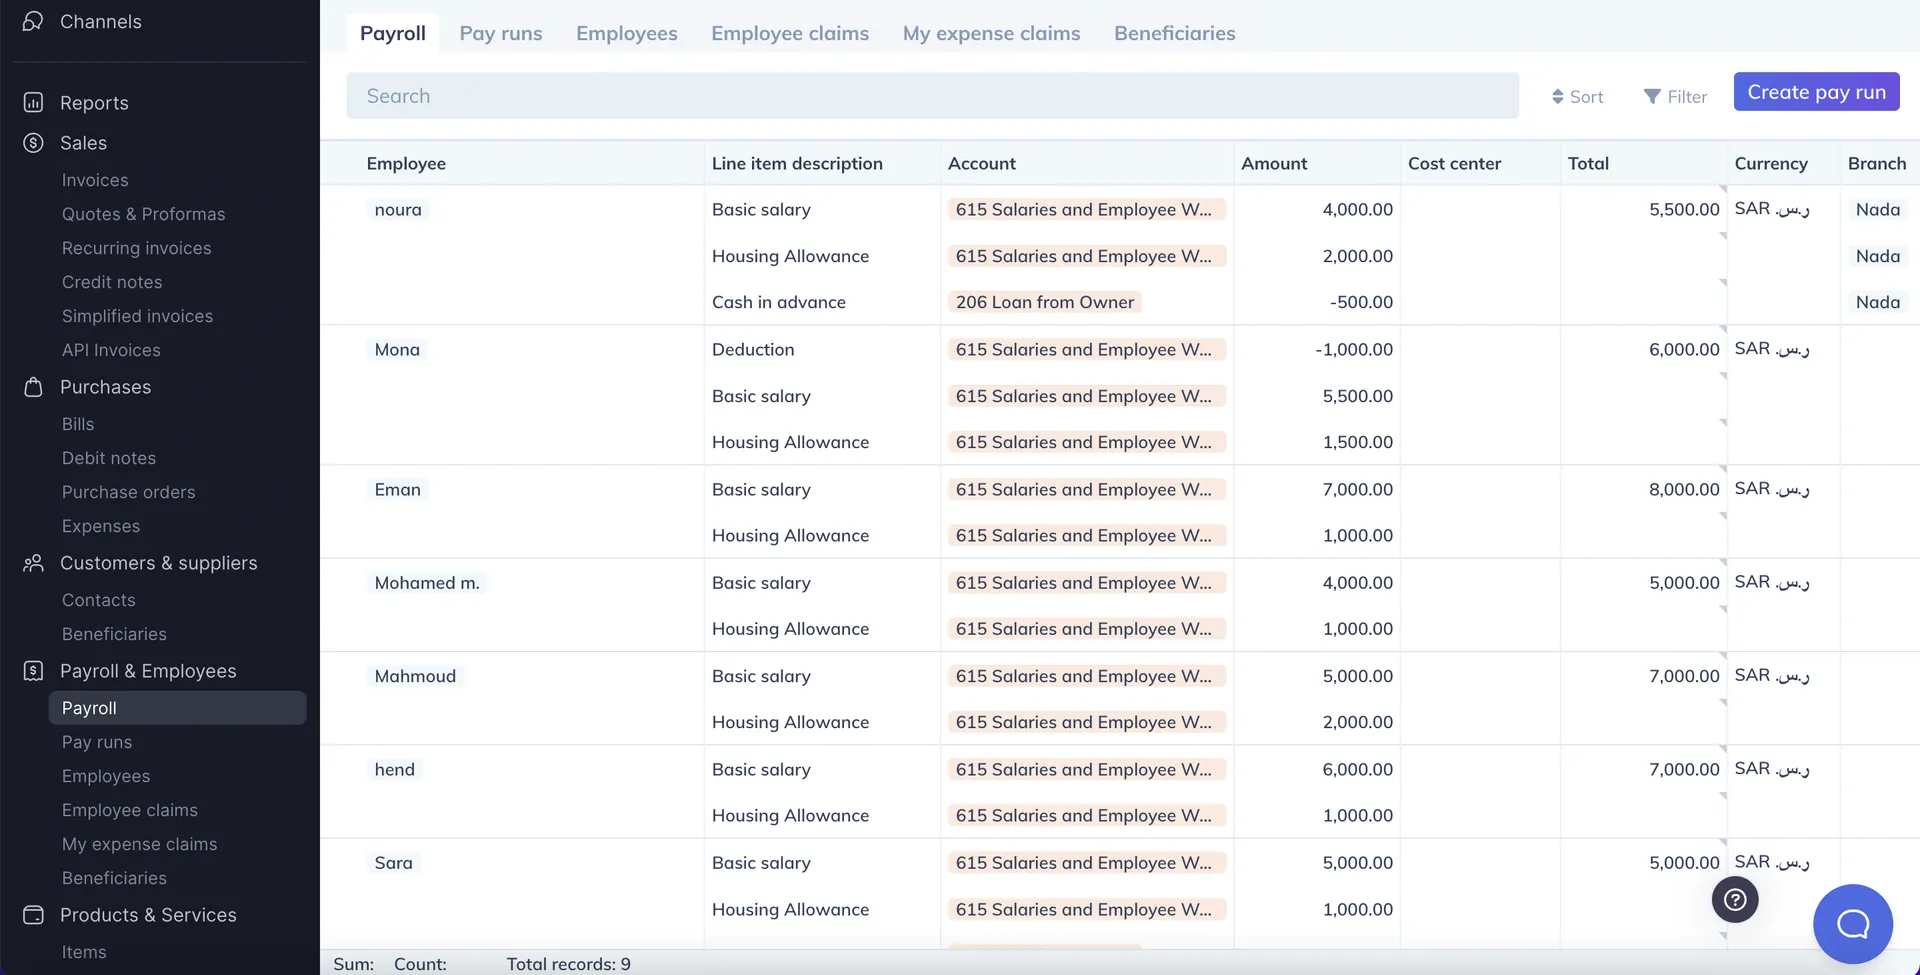
Set up payroll
- Go to
Payrollin the lef-side menu - On the Payroll sheet, list your employees, their pay items (e.g. Basic Salary, Housing) and the amounts of each pay item.
- In the
Include in pay run, chooseYes
Payroll is now ready and will serve to generate payslips for each payroll period.
Run payroll
Whenever you'd like to run payroll:
- Go to
Payrollin the lef-side menu. - Make sure
Include in pay runis set toYesfor employees you'd like to include in this pay run. - Click
Create pay run. - Draft payslips will be created for each employee.
- Set the
Period startdate, which is the date you'd like the salaries to be expenses. - Change the status to
POSTEDtoo book the salaries as expenses. Once you do that, your Profit & Loss statement will be updated.
Pay payroll
When you pay your employees:
- Go to the
Pay runsin the lef-side menu. - For each payslip, click the
+button under thePaymentscolumn. - Record a payment
Send payslips
To send payslips to your employees:
- Make sure each employee has an email address by going to the
Employeespage on the left-side menu. - Go to the
Pay runspage on the left-side menu - Check the boxes next to each payslip you'd like to send
- Click
Send payslipsin the top right corner - You will get a preview of the payslips to be sent
- Click
Sendto send the payslips.
Draft payslips
You cannot send payslips in DRAFT status. You can only send payslips that are in status POSTED or PAID.


![New Product Features [March-2023]](https://firebasestorage.googleapis.com/v0/b/wafeq-docs.appspot.com/o/medias%2Fd68397dc_Help Center - EN Article Cover-22.png?alt=media)


.png?alt=media)